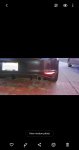
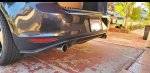
Clutch Replacement, Days 3 & 4: Reassembly.
Not sure why, but reassembling things is always easier than taking it apart to begin with, at least for me. Getting the transmission back in its home was special treat that I really don't ever want to do again. I did find that using the engine support bar as a very slow lift allowed me to raise the transmission just high enough that I could slide under it and push it into final position. The rest of the job was just doing the reverse of what I did to get to the clutch. Pretty straigh forward, just took time as it is hot & humid and I was in no hurry. I had no parts left over, so I was pretty happy.
Lessons learned:
- Hindsight being 20/20, I will contact the indy shop near me for a job like this in the future. Great experience but my time could have been used to do plenty of other things around the house this long weekend.
- Bring a buddy to help
- Make sure you have plenty of time, especially if you don't do this level of work often
- Take a break often, especially in this heat
- Research the whole job before you start so that you don't have to waste time searching stores for parts / tools / other material. I had almost everything but a 1/4" drive 6mm hex that took a couple hours to find in a local store.
- Write down all of the torque specs ahead of time so that you don't spend a while looking through the service manual to find them
- Removing the axles made this job so much easier. Take it for an alignment check later
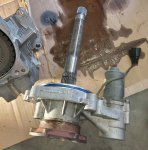
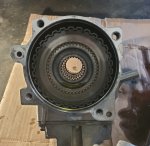
- Be careful removing the VAQ, don't pull on the axle flange if you can avoid it. I must have pulled a little to hard and it came out of the housing, and unleashed a flood of fluid everywhere. I tried to push it back in but it did not want to pop back in. Eventually I took it apart and found that there is a small snap ring on the shaft that must be compressed just right for the shaft to slide back into the assembly. A couple of pictures below for those interested what the interior looks like.
First impressions of the DKM dual disk clutch:
- As mentioned by many, this thing is stiff out of the box. Will take me a couple of days to get accustomed to the pressure required to push it in. I hope that there will be no accidents in the next couple of weeks on the interstate. Hopefully by the time I reach 500 miles, the clutch will break in and be easier to use.
- The engagement point is super low. I had to take out my clutch stop to ensure that I could push the pedal in enough to disengage the clutch. Research tells me that the engagement point moves up as it breaks in, so time will tell.
- Can't wait to really enjoy my stage 2 tune. My clutch had been slipping for a while, so I have been babying the car waiting for the right time to replace the clutch.