JetTurbo
geezer
- Location
- South Florida, USA
- Car(s)
- 2018 GTi Autobahn 6M
I was preparing an answer for another thread and ended up
throwing together a drivers door card removal DIY from pics I had taken six months ago.
Decided it needed its own thread
instead of burying the response in a thread about a switch. :smile:
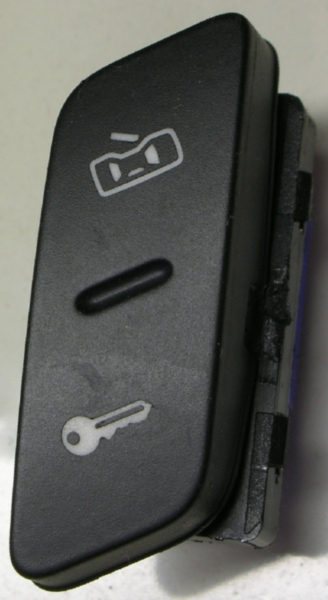
reference: central locking button
----
To replace the central lock switch, the door card is removed,
then the latch release assembly is removed from the door card
to provide access to the switch.
Using a trim wedge, pry off the plastic grip shell with the switches and grab handle.
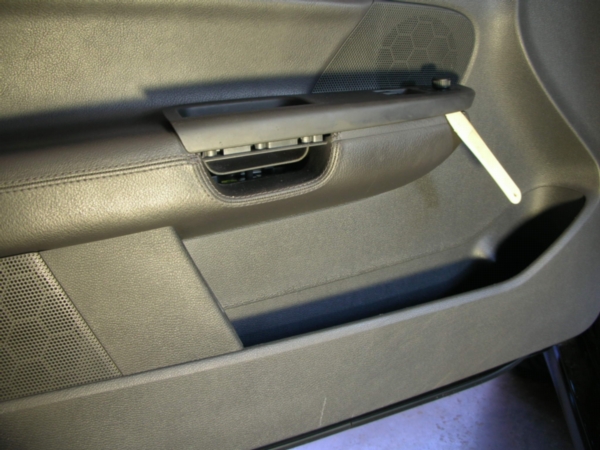
The shell is only held in place by trim clips

No need to unplug these electrical connections,
the grip shell is popped free for access to ...
Remove two T27 Torx behind the door grip handle shell.
After I removed the T27 screws I popped the grip shell
back in place to keep it from dangling by its harness.
The harness for these switches is part of the door card.

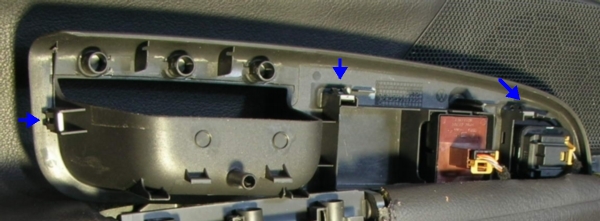
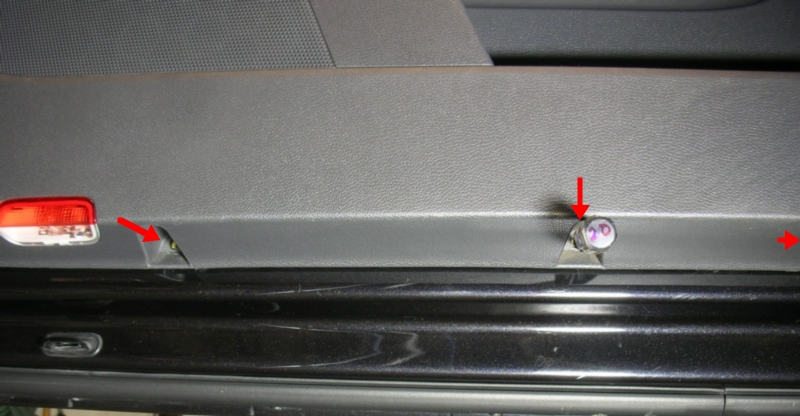
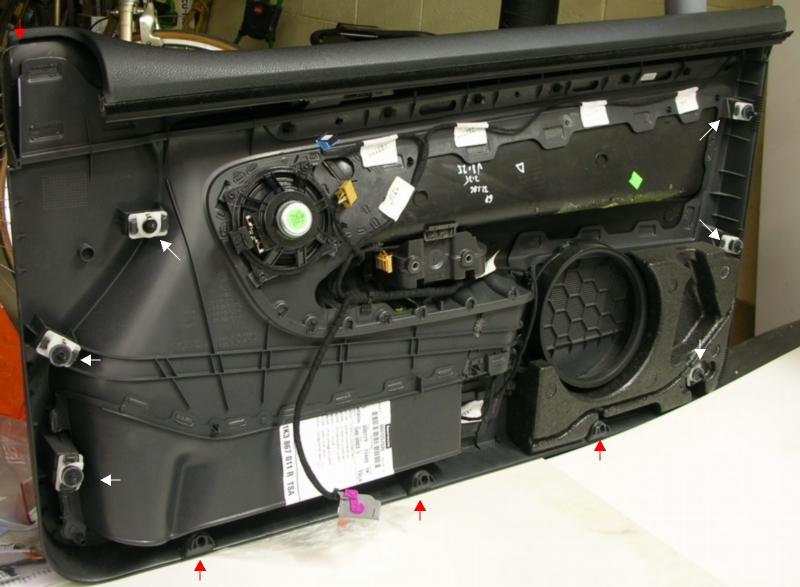
Then remove four T20 Torx,
one at top front edge

and remove three T20 Torx screws along bottom edge.
left and center shown, third one is out of picture on right.
Free door card by releasing six trim clips using trim disassembly pliers.
(I use an inexpensive KD tool - KD3705)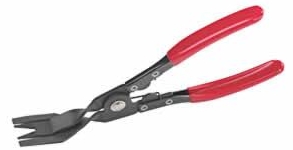
Reference the photo below of the inside of the door card for trim clip locations.
Release the rear bottom clip first, then bottom front, and work your way up the sides evenly.
Pay attention to how the door card fits before this next step,
reversing this step can be the biggest challenge to re-assembly.
Pull door card vertically upward, out of window shaft.
red arrows = T20 Torx (4) - white arrows = trim clips (6)
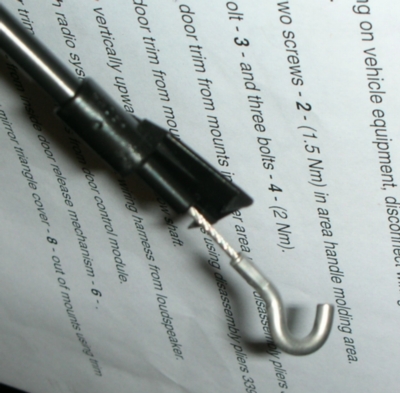
Release the door latch cable from the door release handle
by prying the black plastic retaining clip free and unhooking the cable.
door release cable (removed) with black plastic retaining clip
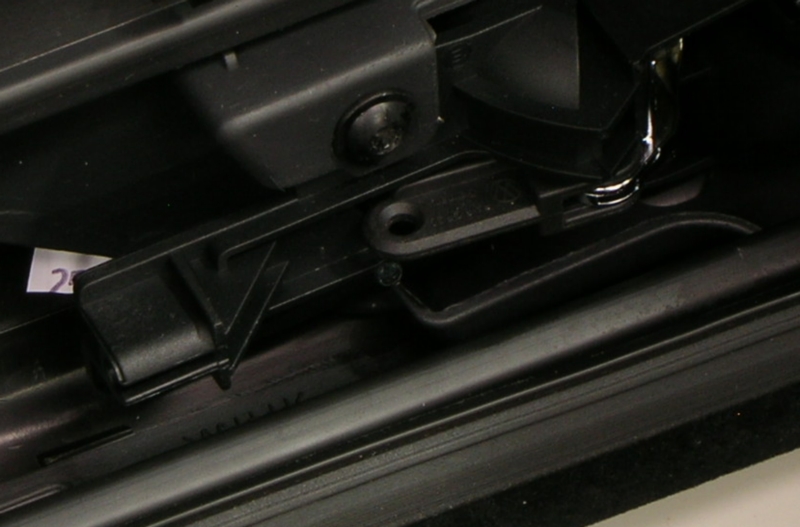
door release mechanism back side - cable already removed
Unplug connection to speaker in door card.
Unplug door card harness from door controller
by lifting the colored locking bar
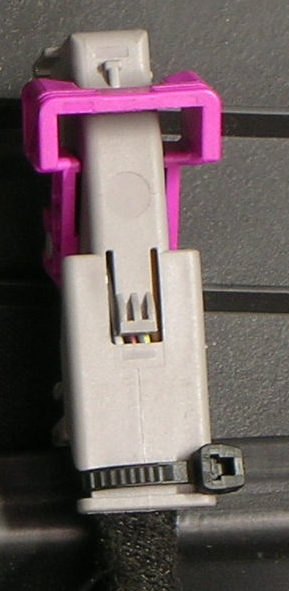
--- door card is now free ---
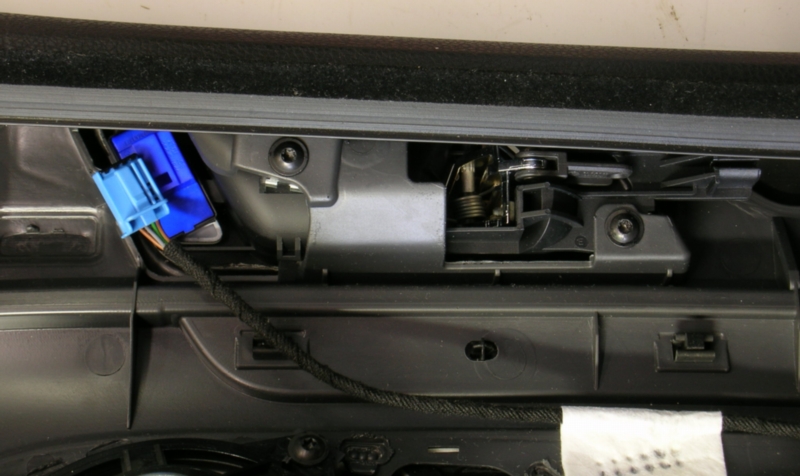
Unplug the sub-harness from the lock switch.
(harness is unplugged and resting on top of the switch in this photo)
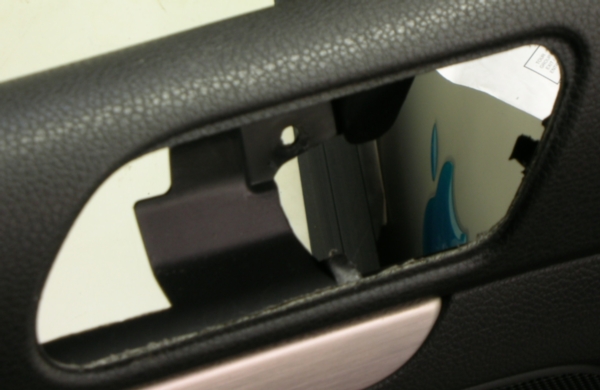
Remove the door release sub-assembly to gain access to the switch catches.

There are two T20 Torx holding the sub-assembly to the door card, remove them.

Then pry the release mechanism free of the door card's plastic positioning tabs.
(for clear access to then release the tabs holding the door lock switch in place)

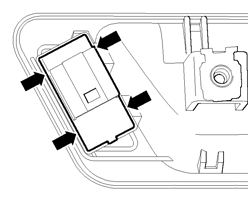
Remove the switch from the release handle assembly
BTW When I performed this task, I was unsure if the switch was the real solution. (it was)
I purchased my replacement 1K0 962 125 switch from VWParts4Sale.com for $26, roughly half the cost of new,
been six months and no regrets so far.
Before re-assembly, inspect the securing clips for damage and replace if necessary.
Re-assembly is the reverse of the above.
Only challenge is getting the door card re-seated in the window shaft.
I have done it twice, and the second time still took me 10 minutes of fiddling
before I remembered I how did it the first time.
Pretty much lined it up, using two hands,
pressed it down into the window shaft.
For more detail, I use and recommend the mother of all DIY,
Volkswagen GTI, Rabbit 2006, 2007, 2008,2009 Repair Manual
by Volkswagen of America, Bentley Publishing Stock Number: VAG6
throwing together a drivers door card removal DIY from pics I had taken six months ago.
Decided it needed its own thread
instead of burying the response in a thread about a switch. :smile:
reference: central locking button
----
To replace the central lock switch, the door card is removed,
then the latch release assembly is removed from the door card
to provide access to the switch.
Using a trim wedge, pry off the plastic grip shell with the switches and grab handle.
The shell is only held in place by trim clips
No need to unplug these electrical connections,
the grip shell is popped free for access to ...
Remove two T27 Torx behind the door grip handle shell.
After I removed the T27 screws I popped the grip shell
back in place to keep it from dangling by its harness.
The harness for these switches is part of the door card.
Then remove four T20 Torx,
one at top front edge
and remove three T20 Torx screws along bottom edge.
left and center shown, third one is out of picture on right.
Free door card by releasing six trim clips using trim disassembly pliers.
(I use an inexpensive KD tool - KD3705)
Reference the photo below of the inside of the door card for trim clip locations.
Release the rear bottom clip first, then bottom front, and work your way up the sides evenly.
Pay attention to how the door card fits before this next step,
reversing this step can be the biggest challenge to re-assembly.
Pull door card vertically upward, out of window shaft.
red arrows = T20 Torx (4) - white arrows = trim clips (6)
Release the door latch cable from the door release handle
by prying the black plastic retaining clip free and unhooking the cable.
door release cable (removed) with black plastic retaining clip
door release mechanism back side - cable already removed
Unplug connection to speaker in door card.
Unplug door card harness from door controller
by lifting the colored locking bar
--- door card is now free ---
Unplug the sub-harness from the lock switch.
(harness is unplugged and resting on top of the switch in this photo)
Remove the door release sub-assembly to gain access to the switch catches.
There are two T20 Torx holding the sub-assembly to the door card, remove them.
Then pry the release mechanism free of the door card's plastic positioning tabs.
(for clear access to then release the tabs holding the door lock switch in place)
Remove the switch from the release handle assembly
BTW When I performed this task, I was unsure if the switch was the real solution. (it was)
I purchased my replacement 1K0 962 125 switch from VWParts4Sale.com for $26, roughly half the cost of new,
been six months and no regrets so far.
Before re-assembly, inspect the securing clips for damage and replace if necessary.
Re-assembly is the reverse of the above.
Only challenge is getting the door card re-seated in the window shaft.
I have done it twice, and the second time still took me 10 minutes of fiddling
before I remembered I how did it the first time.
Pretty much lined it up, using two hands,
pressed it down into the window shaft.
For more detail, I use and recommend the mother of all DIY,
Volkswagen GTI, Rabbit 2006, 2007, 2008,2009 Repair Manual
by Volkswagen of America, Bentley Publishing Stock Number: VAG6
Last edited: