Diggs24
Autocross Champion
- Location
- de plains! de plains!
- Car(s)
- 2015 GTI
That was fun. Car runs. Nothing blew up or caught fire. Success?
So the ebay pump I bought the brass line on the bottom got mangled in shipping. They should be sending another (or they said they will). Well, I decided to use it as a test before doing this on my own. That was great because I could figure out what to do without messing things up and I'm glad I did.
Ok, first off you don't need a press but it isn't easy to press that bearing out. First one I did it no problems. On my pump...SNAP. Broke the retainer. Good thing the autotech has it's own!
Tools needed:
vise grips
16mm wrench
16mm socket
18mm wrench (or socket)
long thick screwdriver or two
M10 triple square (This set has been great):
https://www.amazon.com/gp/product/B073RS9L9J/ref=oh_aui_detailpage_o07_s00?ie=UTF8&psc=1
Bearing puller:
https://www.harborfreight.com/bearing-separator-and-puller-set-62593.html
Bench Vise
1/2" drive 1 1/16" deep socket
https://www.amazon.com/gp/product/B000NHUS8Y/ref=oh_aui_detailpage_o00_s00?ie=UTF8&psc=1
breaker bar
impact gun (yup...)
REMOVAL
Autotech instructions for removal were spot on except no need to take off intake (mine is OEM). Just follow them. I found the vise grips helpful to squeeze the clamp for the rubber line. Gas will spray out from this, so wear glasses and pull hose towards you as it comes off so when it sprays it goes towards intake. I also opened the gas cap to relieve pressure.
http://bd8ba3c866c8cbc330ab-7b26c6f3e01bf511d4da3315c66902d6.r6.cf1.rackcdn.com/10127103k.pdf
Use a good thick screwdriver to pry the lower line to the right while turning the pump counterclockwise to get the ball end of the fitting out of the brass threaded end. Once that line is off twist back and forth while pulling it and will come right out.
Once it's free clamp it down in a vice with some towels under it.
Now, this was SUPER helpful. I just happened upon it with my googlefu:
http://vortexperformance.co.za/images/mk7_hpfp_install.pdf
They walk through it using the bearing puller! Sweet. So, one downside...the spring is super stiff. You won't be able to get the edges of the puller perfectly under the retainer. Maybe someone smarter out there can figure it out but I was too afraid to mangle the spring since it is reused.
Here is someone using the puller.
https://www.youtube.com/watch?v=1zurCUGh0uw
The hard part for us is keeping the itty bitty ball bearing on the tip centered on the shaft of the pump. It was very hard to keep centered and I had to jam a wrench in there and hold it next the threaded rod while turning. It sucked. I think because you can't get the puller 100% flat under the retainer is why mine broke. Oh well, not needed.
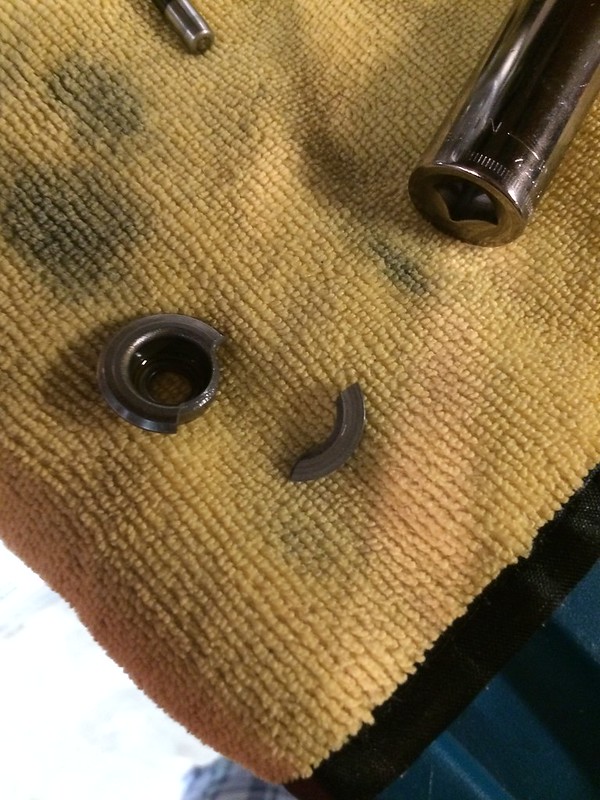 image by Diggs24, on Flickr
The 16mm ratchet and 16mm wrench are for the nuts on the sides of the puller to tighten. The 18mm is to turn the shaft on the top. The nuts on the top to hold bracket in place I think were 14mm? I just used my fingers.
At some point you will begin to pull the retainer up and it will pop and you're done. Loosen and take off puller. Spring, bearing and retainer you just pull out. Set them aside someplace clean as the spring is reused.
Now we get to use the special autotech tool (yes you need this) and your 1 1/16 deep socket. So, on my junk pump I tried this with a breaker. NO DICE! Stupid thing started rounding off. Not good for getting metal shards in the engine. There were some in my junk pump. Really not good. Good thing you can use either side. I just flipped it over.
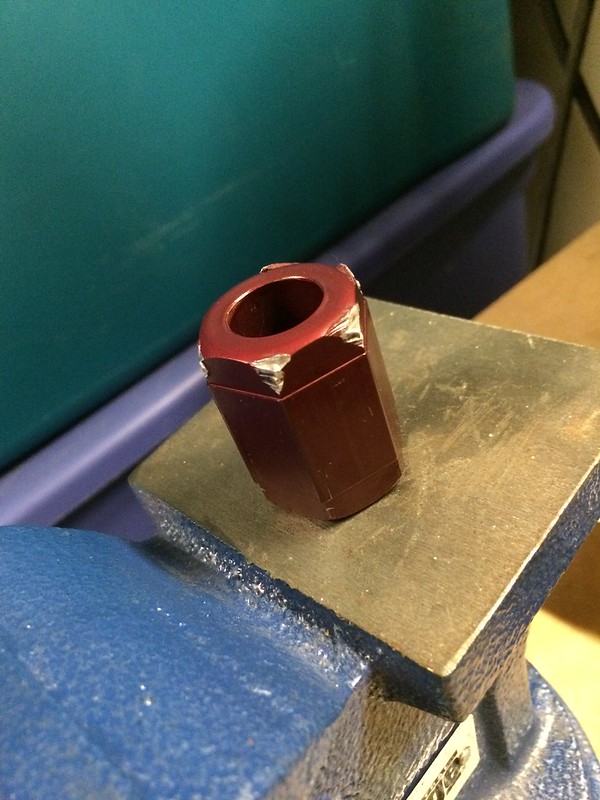 image by Diggs24, on Flickr
So, this is where you need the impact. Good thing our socket we bought is 1/2" drive. Push down firmly and a quick pop of the trigger and she's loose. Worked perfectly on my good pump (whew) with no shards or rounding. Hand screw it out. Take out old piston and set aside.
 image by Diggs24, on Flickr
Lube up your autotech piston with some oil and put it in the housing just like the guide (page 10/19). Put housing back into pump and hand tighten. Here I did not use an impact but instead breaker bar. I don't know what the torque is but tight is good (60 ft lbs I guess). Set spring in.
With Autotech pump they give you a retainer that is 2 pieces with a groove on the inside. The spring is super loose now so you just slide the two pieces and and push down and the 2 pieces clamp onto the piston and when you release tension will stay in place. Super easy.
FITTING
Pump is ready to go back in. This was harder than taking it out. Lube it up with some oil. You have to slide it in while using screwdriver to push lower line to the right then push down on pump to get the line and the brass fitting on the same plane. Once they engage you have to use screwdriver and jam it back to the left while turning pump clockwise so they both pop back into place. Now, for some reason the pump did not want to go back in to the block. DO NOT start threading the lower line yet. Align the holes with the threads on the engine block. Jam a screwdriver next to it to keep it aligned if needed. For some reason the pump did not want to go into the block, I could feel the spring give a bit but that was it. I pressed on....
Get your 2 M10 bolts and push the pump in while threading them in. They should thread in a few threads easily. If they don't you are not aligned! Don't cross thread these dumbass. Once they engage you can begin cranking them down 2-3 turns at a time. Upper left, lower right, upper left, lower right until the pump fully seats to engine. Tighten to like 40 ft lbs or something. Not super tight. Thread nut back on lower fitting and use 17mm wrench to tighten. Again, like 30lft blbs maybe. Then connect rubber line back with vise grips and hook electrical connector back on. Put gas cap back on and open and close drivers door a few times to prime pump. Start it up and check for leaks. Take it for a spin and make sure nothing catastrophic has happened.
Took me about 3 hours taking my time (and basically doing it twice).
Random pics of tools I used:
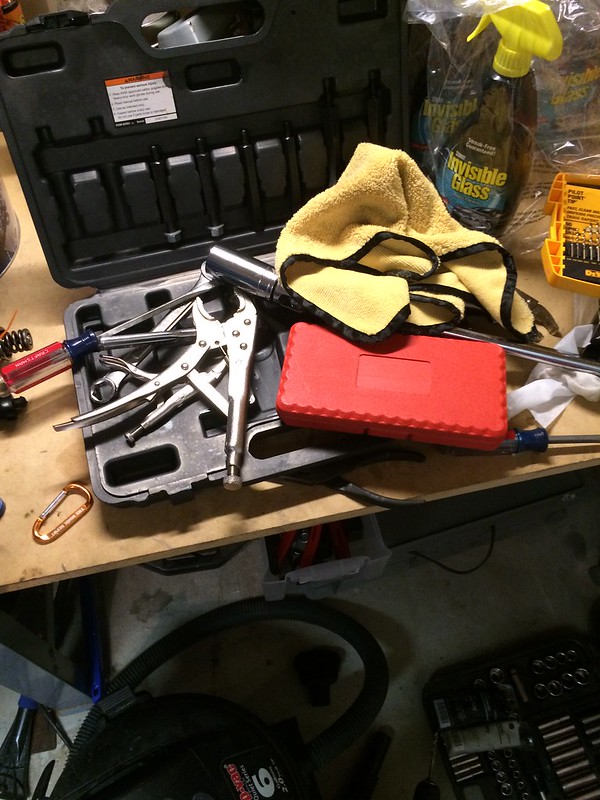 image by Diggs24, on Flickr
 image by Diggs24, on Flickr
Have fun!
So the ebay pump I bought the brass line on the bottom got mangled in shipping. They should be sending another (or they said they will). Well, I decided to use it as a test before doing this on my own. That was great because I could figure out what to do without messing things up and I'm glad I did.
Ok, first off you don't need a press but it isn't easy to press that bearing out. First one I did it no problems. On my pump...SNAP. Broke the retainer. Good thing the autotech has it's own!
Tools needed:
vise grips
16mm wrench
16mm socket
18mm wrench (or socket)
long thick screwdriver or two
M10 triple square (This set has been great):
https://www.amazon.com/gp/product/B073RS9L9J/ref=oh_aui_detailpage_o07_s00?ie=UTF8&psc=1
Bearing puller:
https://www.harborfreight.com/bearing-separator-and-puller-set-62593.html
Bench Vise
1/2" drive 1 1/16" deep socket
https://www.amazon.com/gp/product/B000NHUS8Y/ref=oh_aui_detailpage_o00_s00?ie=UTF8&psc=1
breaker bar
impact gun (yup...)
REMOVAL
Autotech instructions for removal were spot on except no need to take off intake (mine is OEM). Just follow them. I found the vise grips helpful to squeeze the clamp for the rubber line. Gas will spray out from this, so wear glasses and pull hose towards you as it comes off so when it sprays it goes towards intake. I also opened the gas cap to relieve pressure.
http://bd8ba3c866c8cbc330ab-7b26c6f3e01bf511d4da3315c66902d6.r6.cf1.rackcdn.com/10127103k.pdf
Use a good thick screwdriver to pry the lower line to the right while turning the pump counterclockwise to get the ball end of the fitting out of the brass threaded end. Once that line is off twist back and forth while pulling it and will come right out.
Once it's free clamp it down in a vice with some towels under it.
Now, this was SUPER helpful. I just happened upon it with my googlefu:
http://vortexperformance.co.za/images/mk7_hpfp_install.pdf
They walk through it using the bearing puller! Sweet. So, one downside...the spring is super stiff. You won't be able to get the edges of the puller perfectly under the retainer. Maybe someone smarter out there can figure it out but I was too afraid to mangle the spring since it is reused.
Here is someone using the puller.
https://www.youtube.com/watch?v=1zurCUGh0uw
The hard part for us is keeping the itty bitty ball bearing on the tip centered on the shaft of the pump. It was very hard to keep centered and I had to jam a wrench in there and hold it next the threaded rod while turning. It sucked. I think because you can't get the puller 100% flat under the retainer is why mine broke. Oh well, not needed.
image by Diggs24, on FlickrThe 16mm ratchet and 16mm wrench are for the nuts on the sides of the puller to tighten. The 18mm is to turn the shaft on the top. The nuts on the top to hold bracket in place I think were 14mm? I just used my fingers.
At some point you will begin to pull the retainer up and it will pop and you're done. Loosen and take off puller. Spring, bearing and retainer you just pull out. Set them aside someplace clean as the spring is reused.
Now we get to use the special autotech tool (yes you need this) and your 1 1/16 deep socket. So, on my junk pump I tried this with a breaker. NO DICE! Stupid thing started rounding off. Not good for getting metal shards in the engine. There were some in my junk pump. Really not good. Good thing you can use either side. I just flipped it over.
image by Diggs24, on FlickrSo, this is where you need the impact. Good thing our socket we bought is 1/2" drive. Push down firmly and a quick pop of the trigger and she's loose. Worked perfectly on my good pump (whew) with no shards or rounding. Hand screw it out. Take out old piston and set aside.
image by Diggs24, on FlickrLube up your autotech piston with some oil and put it in the housing just like the guide (page 10/19). Put housing back into pump and hand tighten. Here I did not use an impact but instead breaker bar. I don't know what the torque is but tight is good (60 ft lbs I guess). Set spring in.
With Autotech pump they give you a retainer that is 2 pieces with a groove on the inside. The spring is super loose now so you just slide the two pieces and and push down and the 2 pieces clamp onto the piston and when you release tension will stay in place. Super easy.
FITTING
Pump is ready to go back in. This was harder than taking it out. Lube it up with some oil. You have to slide it in while using screwdriver to push lower line to the right then push down on pump to get the line and the brass fitting on the same plane. Once they engage you have to use screwdriver and jam it back to the left while turning pump clockwise so they both pop back into place. Now, for some reason the pump did not want to go back in to the block. DO NOT start threading the lower line yet. Align the holes with the threads on the engine block. Jam a screwdriver next to it to keep it aligned if needed. For some reason the pump did not want to go into the block, I could feel the spring give a bit but that was it. I pressed on....
Get your 2 M10 bolts and push the pump in while threading them in. They should thread in a few threads easily. If they don't you are not aligned! Don't cross thread these dumbass. Once they engage you can begin cranking them down 2-3 turns at a time. Upper left, lower right, upper left, lower right until the pump fully seats to engine. Tighten to like 40 ft lbs or something. Not super tight. Thread nut back on lower fitting and use 17mm wrench to tighten. Again, like 30lft blbs maybe. Then connect rubber line back with vise grips and hook electrical connector back on. Put gas cap back on and open and close drivers door a few times to prime pump. Start it up and check for leaks. Take it for a spin and make sure nothing catastrophic has happened.
Took me about 3 hours taking my time (and basically doing it twice).
Random pics of tools I used:
image by Diggs24, on Flickr
image by Diggs24, on FlickrHave fun!
Last edited:


